Monday, October 1, 2018

Sun and the Moon

These are some pieces that we completed in one of my art camp sessions this summer.  It is a great lesson to do on culture, and while many cultures have worshiped the symbols of the sun and the moon, the Aztecs are a great place to start with the symbolism.
First, the circle is a common symbol to use for the circle of life, and well, the sun and the moon fit perfectly in that category.  They are also the perfect balance of one another.  While the sun is the symbol for rebirth, energy, strength, light, and power, the moon symbolizes cooling, calm, reflection, mystery, and the dream world.
After the students practiced their images, we just did a simple water color resist painting. 


Wednesday, August 22, 2018

Compliment Colors with Art Stixs

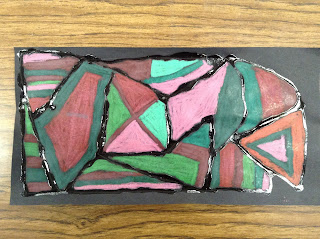
This is a compliment color project that all my 3rd, 4th and 5th graders worked on this past year.  I love black glue and the results, but I don't always love mixing the the glue with paint.  I've done it all.  For many years, I did glue with india ink.  If you don't get the proportions right, then it gets really gummy.
I've done glue with black acrylic, I get very similar results...too gummy. I've done black tempera with glue, which seems to work alright, but they seem to turn quickly, and tempera just stinks, so there's that.

This is a beautiful solution, although right now,  an expensive one!  With the slime craze going on right now glue in general is expensive, but especially clear glue.
The clear glue on the black construction paper shows up black, and as a little bonus, it's SHINY!
The results are fabulous and super easy.  And you don't have to spend several hours mixing up black glue that may or may not work for you.


Wednesday, May 2, 2018

2 Point Perspective Gingerbread Houses

This is a lesson that we worked on before the Christmas break and into January.  We did two point perspective with just a simple house.  This was a good way, not too complicated, to introduce perspective drawing.  
We walked through the steps as a class, which helped to keep everyone at the same pace.
Once the house was complete, the kids turned them into gingerbread houses, so that they didn't look so cookie cutter.
This lesson was done with both 4th and 5th graders, and both grade levels really struggled with using a ruler.  The kids just don't use ruler enough to know how to use them correctly. 
They were able to choose how to color their pieces, but many did sunsets and aurora borealis.
These took two art classes to draw the house (with lots of time going over how to hold the ruler), and 2-3 days of adding details and coloring.
I would say that this was a little bit of a challenge for many of the students, but they were really proud at the end once completed.


Thursday, April 19, 2018

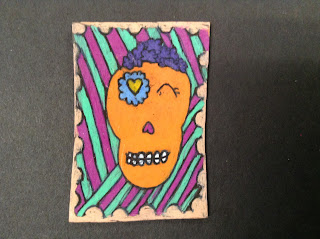
Shrink Art Calaveras

This project is from this fall.  It is one that I come back to occasionally.  I am a sucker for shrink art, I guess.  It is a good quick culture lesson, this lesson is usually just a two day lesson with my 5th graders.  We spend one day planning the lesson, drawing out the art on a paper, sanding the shrink art and then tracing the artwork onto the shrink film.  Day 2 is tracing the lines with black sharpie and color pencil. 
 And, as a bonus, this is also a great STEAM lesson.  

The sheets of plastic is polystyrene which is recycled plastic #6. The polymer chains are bunched up and clumped together when you get it in the sheets.  When they are heated, they are forced to line up in a more orderly fashion. This is their natural state, and the heat is what is activating this process. 

I have a small toaster oven in my classroom.  When they are done with the color process, I call them up one or two at a time to watch their shrink art.  


This way they get to see the process of the shrink film rolling and curling before it flattens itself out.  It really is a fun process to watch.


And once it is done, they let me know that their shrink art is ready to come out of the oven. 

Once we are done with the display from the art show, I will be putting magnets on the backs so that they can put them on their fridge or someplace visible at home.


Friday, November 10, 2017

Art Room 2017-18

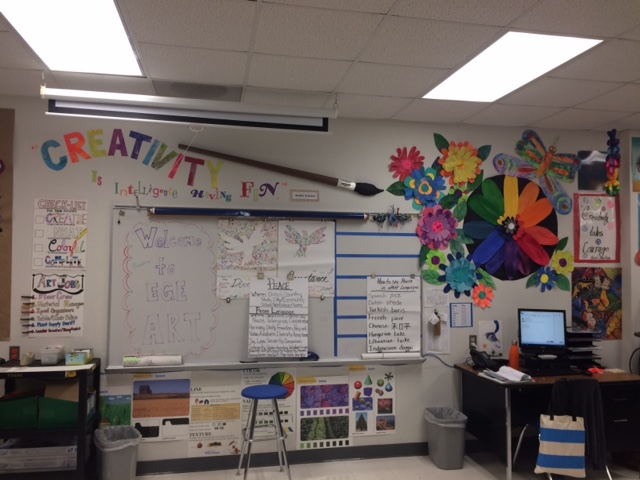
I have been super behind on posting everything this year.  Especially since we are past our first nine weeks grading period and into our second.  Things aren't this shiny and clean anymore...but then again it's the art room.  If it were perfectly clean and organized all the time, then maybe we aren't creating enough.  
This is my new rug for the art room, and I am in love!  Yes, with the rug, it has been great, the kids each have a target to sit on, and it is so much easier to teach these large classes.  I taught for years using a rug, but when I began teaching part time, the teacher here didn't use a rug.  I mean, it makes all the difference in getting a lesson out.
I was just a tad bit excited!  That is a happy girl right there!

I did a fun paper quilling hanger to mark the table colors, rather than using the color pencil bins I had used in the past. The kids love them and keep asking me to teach them how to do paper quilling.


Color wheel fun!  I love the bright colors and it just makes the room a happy place.  I loved the lady that I taught with, but she felt like things on the wall distracted the kids.  There were 500 other things on the wall, schedules and more schedules, boring things, but none with color.  She was also a collector of things, all things, but in particular furniture.  We had tons of unused furniture in every crook and cranny of the room. It felt like the walls were closing in on me!  I can breathe now.
The pom pom ART letters leading the way to the art room was super cheap and a great way to point the way to the art room.  I just made my letters out of cardboard from old boxes, I think the whole thing cost under $5 and they are really big letters.  I found this super cute idea on Pinterest... of course!

I'm in love with these Day of the Dead dolls and wreath, I mean, they may stay up all year.  I found them at Target, it was a total score.


And then the other Target score was my little collection of crayon banks of different colors
My room is becoming my happy place once again!!

Wednesday, October 25, 2017

International Day of Peace


I always like to do a project for International Day of Peace, I've done something for almost all of the 20 years I've been teaching.  Many of those years I did Pinwheels for Peace.  Which is a great project, the kids love doing the pinwheels and we always made a big deal out of "planting" our pinwheels.  We got everyone involved, music, PE, Enrichment classes, and of course the art class. 


 Although there were many positives to this activity, there are a few things to consider if your going to do it.  Number one, how many kids do you plan to do this activity with and how many people are helping you?  I always had around 600-700 kids, and I had NO help.  My fingers were tired and bleeding from pushing the pins in to make a pinwheel.  Even if the older kids can do it, you will end up helping many. And forget it, Kinder, 1st and 2nd grade, I was envisioning the worst!  So I did ALL of those.
Also, another thing to consider is your soil that you will be planting your pinwheels.  Many years we are in drought stages here in the great state of Texas, and let me tell you, even planting a pencil can be a might feat! There were many tears shed because their pencils broke before they could get it planted.
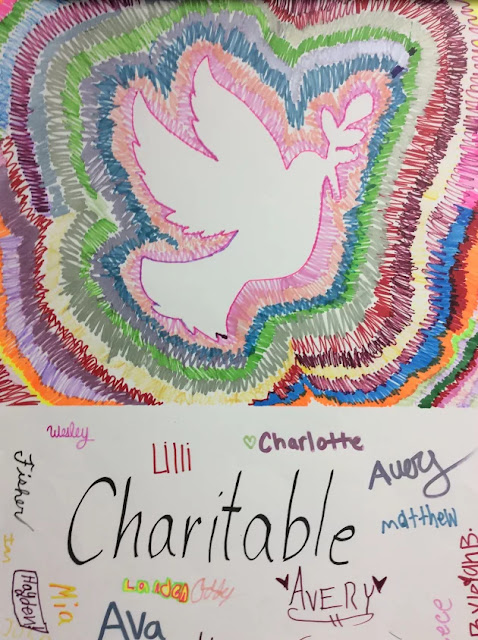
  These days, I'm teaching just under 900 kids, there is no way I could make these and keep my sanity.  So, years back, I did take a much needed break from the pinwheel project and came up with the idea to do these Positive/Negative dove images.  These are great collaborative projects that can be done quickly.  I did these on the first day of school after we went over a few expectations of the art room.  I rotated tables to add to the art work and to sign their poster.  This also fits in nicely with our anti bully program.


  I did these on the first day of school after we went over a few expectations of the art room.  I rotated tables to add to the art work and to sign their poster.  This also fits in nicely with our anti bully program. 
It is also nice to have the peace language up in the hallway, it will hopefully encourage some good discussions and make kids (and adults), to stop and think about kindness.  
The vocabulary is great, and I have heard a few teachers discussing some of the words with their students!  I'd say that is pretty successful.

These were mostly done with sharpie colors, except for kinder, I subbed the crayola art sticks for the sharpies.  Each class chose a symbol, word, line, or shape to fill in the negative space, or positive space.  
Most posters have a different word, although I did repeat a few.  In the future, I might print out the words before hand.   It would look much better than my handwriting.


http://pinterest.com/pruitts/elementary-art-education/