Sunday, December 28, 2014

Eagles Art Night 2014

Eagles Art Night 2014 was a very successful event this year.  We even expanded the art in two places, both the cafeteria and the school gym.  Which was excellent, it made it less crowded and I think people hung around a little longer.  The pictures below are from about half way into the event.  All of the empty  spaces are where art work once hung, but parents framed the work. 


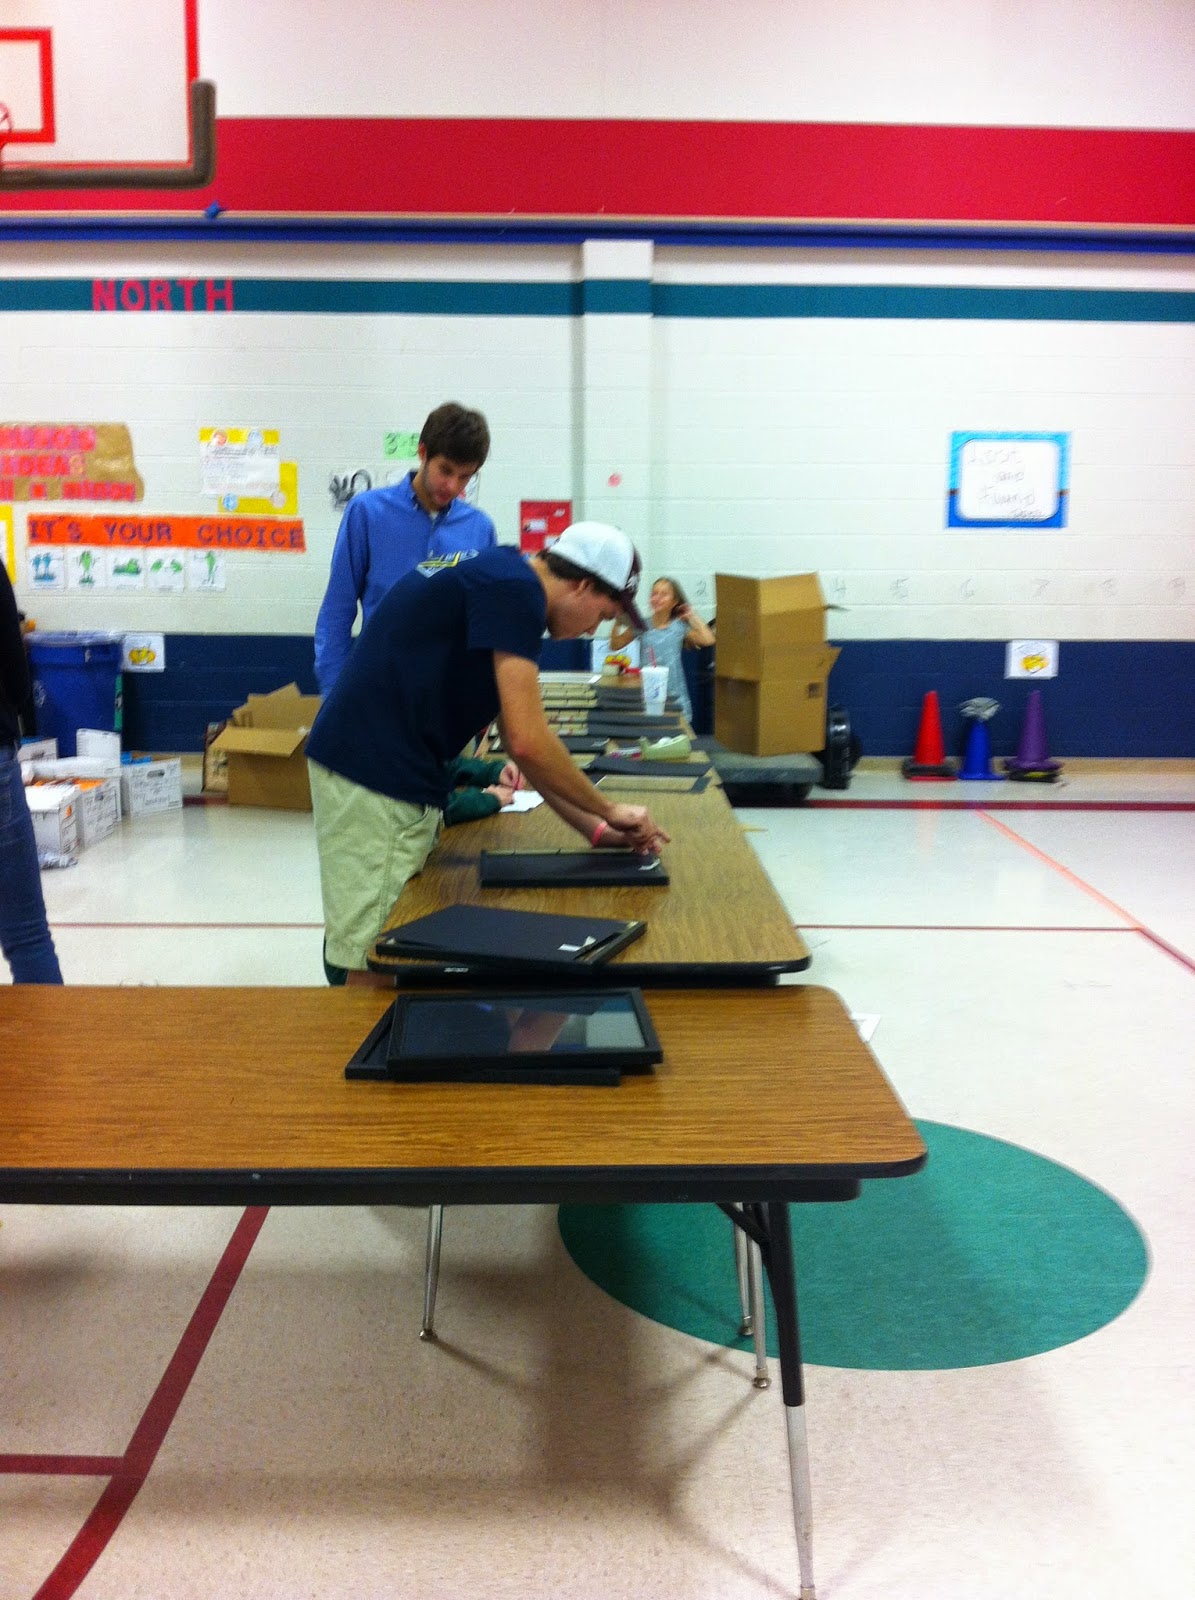
This picture is the framing station, completely lead and worked on by parents.  This year we had 200 frames and sold out.  They placed a second order of frames, but I did not hear what the final count ended up being. 


Here are some of our cuties proudly displaying their work.  This is such a huge event for our school and it would not be possible without all the parent volunteers.  We had volunteers double checking to make sure every one of our 720 students had artwork.  We had volunteers checking to see that every child signed their name and it had the appropriate class label on the back.  We had volunteers to hang the work on the butcher paper. Parent volunteers for getting the work both up and down in their displays, and volunteers who ordered frames and did the framing.  Talk about team effort!  Oh, and did I mention we had a talent show during the art exhibit that required volunteers to organize that as well.  I love to see that this school community embraces and celebrates the arts.


Friday, December 19, 2014

Hot Beverages


For a wintery lesson with my second graders, I decided we would do hot beverages such as coffee, hot cider, or hot cocoa.  I've seen several samples of these on pinterest and fell in love!  All of the samples I have seen were paintings.  I decided that I really didn't want to get into a painting project right before the Christmas break.  As paint projects are a little more unpredictable and I wanted to stick with a 2 day project.  So, I adapted the lesson to be a sharpie outline and colored in with marker. They were free to design their mugs and pick their toppings.

This lesson was a two day art piece.  Day one they did their planning paper and then they were able to move to the final to start the drawing.  Day two they traced with black sharpie, and they colored their images with marker.


Tuesday, December 16, 2014

And the Grinch's Small Heart Grew 3 Sizes that Day


Here is the second image I did with my third graders.  The timeline for these were also 2 days, with day one drawing and starting the coloring process.  Then day two finishing up the coloring, which was done with art sticks.  
After the fact, I was thinking about the first Grinch picture, and liked that they got to add in something original to it.  This one doesn't lend itself to much freedom, but I think that the little box that is framing his heart could be done in various ways to give that touch of originality.

3rd grade, 2 day project


Saturday, December 13, 2014

The Grinch Who Stole Christmas

I decided to do a series of art pieces based on the children's classic show The Grinch Who Stole Christmas.  I chose to do these with 3rd graders.  On this particular art piece we were showing the Grinch stealing various items from the good people of Whoville.


They really seem to have fun picking what the Grinch was snatching.  This poor little Whoville family just lost their family pet.

This was a two day project for us.  We drew and started coloring on day one and finished on day two.  We used Crayola Art sticks on black paper.


While most of this group did candy canes, ornaments and presents they could really get creative with what is going into the bag.


Saturday, November 29, 2014

Hermit Crab with Eric Carle

I am wrapping up our Eric Carle unit of study and these are some of the first finished.  I have done these before at my other school, with a few changes.  These collages are great for kinder cutting skills and especially following step by step instructions.  They learn very quickly that if they don't listen their pictures may not turn out.  For example, the shell, if it isn't glued with the "opening" facing one of the sides, there may not be enough room for the hermit crab at all.  If it faces up, the hermit crab looks like it's fallen and it can't get up.  (Sorry,  I couldn't resist!!) But, there is also room for artistic decisions, like  how to cut the seaweed, how much. Where to put the starfish.  Can't wait to show off some of the other Eric Carle designs!


Thursday, November 20, 2014

Kinder; Cutting Lines

This is a project that my co teacher has just wrapped up with kindergarten and I think they are fabulous! There are so many great kinder skills in this one project; line practice, cutting, gluing and painting skills and they all came out beautiful.  
I believe she gave them black paper first, 3/4 size of the white paper.  They drew 2 to 3 different vertical lines, then they cut.  These pieces were then glued to white paper. Day 2, students added crayon lines in the white spaces and then water color resist over the lines.  


I love how the black pops the color.  


I personally find kinder the most challenging of all grade levels.  They are all at different skill levels entering kinder and usually by 1st the kiddos that seem to be behind are catching up.  

One of my best parts of doing a job share is that we are learning from one another.  I've added a lot of good tools to my teacher toolbox through this experience.  Hopefully she can say the same.  


Wednesday, November 12, 2014

Come Sail Away with Me

These sailboats were created by my third graders. This project has been an on going art piece for about six weeks. Working on these little by little till everyone had their sailboats traced with glue.  
For this project we discussed foreground, middle ground and back ground.  We also talked about other possible ways to make our pictures unique, like weather, profile of the boats vs. front view.  We discussed time of day and adding land in the foreground or sides as well.   

Once we were done with the discussion, students went to work on scrap papers figuring out their designs.  Then, these were recreated on the black construction paper.  Since we were using glue, I had to tell them to keep their design simple.  Too many details would actually not be good for this particular art piece.  Then, once we finished, the kids took turns gluing their projects with gel glue.

We worked on a couple projects while, the gluing process was happening. Then, we finally got to add color.  We used chalk pastel between glue lines.  This was a good project to talk about blending and color mixing.  


Once you are done with chalk pastel, use a facial tissue to lightly dust the glue lines. 

Sample before adding chalk pastel.  Note, you can use regular glue, but the gel glue gives this nice shiny surface. 

http://pinterest.com/pruitts/elementary-art-education/