Friday, November 10, 2017

Art Room 2017-18

I have been super behind on posting everything this year.  Especially since we are past our first nine weeks grading period and into our second.  Things aren't this shiny and clean anymore...but then again it's the art room.  If it were perfectly clean and organized all the time, then maybe we aren't creating enough.  
This is my new rug for the art room, and I am in love!  Yes, with the rug, it has been great, the kids each have a target to sit on, and it is so much easier to teach these large classes.  I taught for years using a rug, but when I began teaching part time, the teacher here didn't use a rug.  I mean, it makes all the difference in getting a lesson out.
I was just a tad bit excited!  That is a happy girl right there!

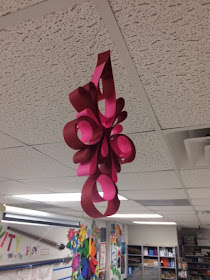
I did a fun paper quilling hanger to mark the table colors, rather than using the color pencil bins I had used in the past. The kids love them and keep asking me to teach them how to do paper quilling.


Color wheel fun!  I love the bright colors and it just makes the room a happy place.  I loved the lady that I taught with, but she felt like things on the wall distracted the kids.  There were 500 other things on the wall, schedules and more schedules, boring things, but none with color.  She was also a collector of things, all things, but in particular furniture.  We had tons of unused furniture in every crook and cranny of the room. It felt like the walls were closing in on me!  I can breathe now.
The pom pom ART letters leading the way to the art room was super cheap and a great way to point the way to the art room.  I just made my letters out of cardboard from old boxes, I think the whole thing cost under $5 and they are really big letters.  I found this super cute idea on Pinterest... of course!

I'm in love with these Day of the Dead dolls and wreath, I mean, they may stay up all year.  I found them at Target, it was a total score.


And then the other Target score was my little collection of crayon banks of different colors
My room is becoming my happy place once again!!

Wednesday, October 25, 2017

International Day of Peace


I always like to do a project for International Day of Peace, I've done something for almost all of the 20 years I've been teaching.  Many of those years I did Pinwheels for Peace.  Which is a great project, the kids love doing the pinwheels and we always made a big deal out of "planting" our pinwheels.  We got everyone involved, music, PE, Enrichment classes, and of course the art class. 


 Although there were many positives to this activity, there are a few things to consider if your going to do it.  Number one, how many kids do you plan to do this activity with and how many people are helping you?  I always had around 600-700 kids, and I had NO help.  My fingers were tired and bleeding from pushing the pins in to make a pinwheel.  Even if the older kids can do it, you will end up helping many. And forget it, Kinder, 1st and 2nd grade, I was envisioning the worst!  So I did ALL of those.
Also, another thing to consider is your soil that you will be planting your pinwheels.  Many years we are in drought stages here in the great state of Texas, and let me tell you, even planting a pencil can be a might feat! There were many tears shed because their pencils broke before they could get it planted.
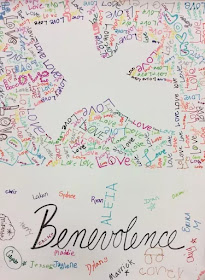
  These days, I'm teaching just under 900 kids, there is no way I could make these and keep my sanity.  So, years back, I did take a much needed break from the pinwheel project and came up with the idea to do these Positive/Negative dove images.  These are great collaborative projects that can be done quickly.  I did these on the first day of school after we went over a few expectations of the art room.  I rotated tables to add to the art work and to sign their poster.  This also fits in nicely with our anti bully program.


  I did these on the first day of school after we went over a few expectations of the art room.  I rotated tables to add to the art work and to sign their poster.  This also fits in nicely with our anti bully program. 
It is also nice to have the peace language up in the hallway, it will hopefully encourage some good discussions and make kids (and adults), to stop and think about kindness.  
The vocabulary is great, and I have heard a few teachers discussing some of the words with their students!  I'd say that is pretty successful.

These were mostly done with sharpie colors, except for kinder, I subbed the crayola art sticks for the sharpies.  Each class chose a symbol, word, line, or shape to fill in the negative space, or positive space.  
Most posters have a different word, although I did repeat a few.  In the future, I might print out the words before hand.   It would look much better than my handwriting.


Sunday, September 10, 2017

All About Food Art Camp

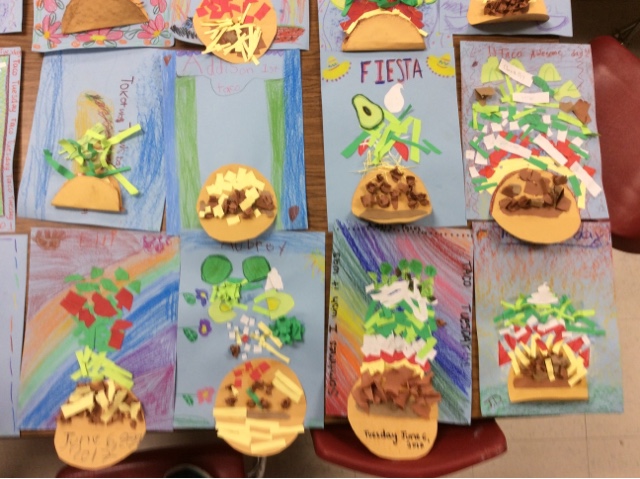
'This is from our art camp this summer. I hosted a food themed camp. The taco Tuesday collage was one of my favorite lessons. The kids were having so much fun creating these collage pieces.  And just looking at these, I'm starting to get hungry. Tacos anyone...?

Shrink art is another of my all time favs! The kids created their food of choice on shrink art and we glued them to these ring blanks that I got on Amazon. They were around $5 for 100 ring blanks. I always ask the kids what their favorite art project was for the week, and shrink art is always a top three!


We also did vegetable printing that we made into a collage, Cezanne fruit bowls and Thiebaud cake paintings.  Clay cupcakes were a favorite, and we decorated our portfolio with cute food characters from Art Hub for Kids on Youtube.   The kids love these videos, and these work out great when I need a few minutes of prep for the next art lesson.  It provides just enough time to get supplies set up.


Monday, August 14, 2017

ARRRG

If you haven't noticed, I am super duper behind on posting.  Better late than never, right!  These are the self portraits created by my 2nd graders. The pirate themed self portraits have been on my list of to-dos for a while now. 
                

Although, in the beginning, some of my students weren't so thrilled about being a pirate. It didn't take long for them to warm up to the idea. And for goodness sake, who isn't halving fun when everyone, including the teacher, is squinting and talking about their "booty"

                 
These were done on 9 by 12 dark gray construction paper.  We drew out the pirate image in pencil and then traced with sharpie.  Once the sharpie was complete, we used Crayola Art Stix to fill in the color.  
                  
Getting the younger groups to push their colors can be hard, but I've found something that motivates them to press their colors.  I ask them to use their art muscles and find examples of those who are already pressing hard.  Then, I make a big deal about how big their art muscles are.  If I compliment the girls, the boys can hardly take it, and they start pressing their colors more.
                     
This was our last lesson for the school year for 2nd grade.  I was really proud of them for hanging in there to the very end.  This is a smaller group of kids, therefore easier to manage.  Some of my larger groups, 3rd and 4th in particular, started giving up around spring break, so I had to simplify my last couple of projects to keep them engaged.
                   
This was a great project to do and will definatly do this one again. 
Especially since portraits can be rather hard, the imperfections  add to the character of the piece. 


Wednesday, July 26, 2017

Art and Science Club at EGE

This year I joined forces with our new Science specials teacher. We held three sessions throughout the year, and limited our enrollment to 20-25 students. We allowed all ages kinder through 5th graders to participate. We also charged $15 per session. Some of the projects we repeated with each group and some we came up with new lessons for the new group.
Down fall, we had to turn lots of kids down because of high interest. We did lots of different projects from connecting circuits to designing t-shirts, creating scribble bots and making crystals. Here are a few projects that I was able to stop long enough to get some pictures.
The paint pendulums were loads of fun (when we had the right paint). We did these on poster board so they would stand up to the paint being poured onto it. This also helped when transferring these to the drying rack. The set up for this was really easy, we just used two student chairs with a broom stick attached to the top. I had students help rig the string and cup to find the perfect setup. A great engineering opportunity. 


We also did a clay project, which we ran out of time to paint. We just encouraged them to paint these at home with whatever paints were available at home to them.

Another favorite was a marbling project. The kids dipped card stock and then they made these into their Mother's Day cards. The cards were really beautiful. I even dipped extra cards and they went into the silent auction for our district. I had lots of request for extra sets after the auction was done. I'll have to remember this for next years art show!