Wednesday, July 29, 2015

Cupcake Weavings

During summer camps, I like to add a variety of activities.  While most weavings seem daunting for a short 4 day camp, these small cardboard weavings are perfect!
Not only do they have the fun of weaving, but also designing the loom.  This year, I decided on a cupcake theme.  While I don't have many photos of the finished product, these few will give you an idea of the completed project.  

I simply love that this is a great introduction to weaving, and those who already know how, well this is a great refresher!  
Below are a few examples from last years weaving on fish looms.


Cereal boxes and other pressed cardboard make an excellent source for the looms.  Plus, it is a great way to reuse!  Saving the earth, one art project at a time...  Seriously, though, it is a great way to teach resourcefulness. And a great way to cut down on expenses.  


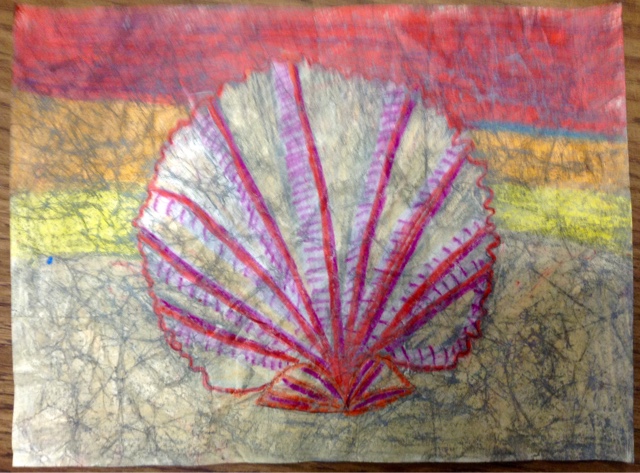
Batik Georgia O'Keefe Sea shells


I am actually playing a little bit of catch up. This summer was super busy and of course the beginning of school is always crazy, trying to get everyone's schedules lined out.  This project was inspired by Georgia O'Keefe with my second graders. It was completed last spring.

We decided to do seashells in the larger than life way O'Keefe would have painted them.  Although she does not have many shell paintings, there are a few. We spent several weeks just practicing and deciding on the shell.

Once the students decided on their shell, they drew them out on Manila paper. I find that Manila paper absorbs the paint just right without disintegrating the paper. I've used paper before where that happened. 
          After they have drawn out the shell, they were asked to use a peach, white and then they could pick a couple additional colors as accents.

Of course this becomes the hardest part of the project, coloring the crayon with thick layers. I usually try to demo what happens if thick layers aren't applied so they fully understand Mrs. Pruitt is not trying to torture them!

Once they have been checked, they are asked to crunch up their paper. Some kids love this part and others hate it. Especially when you have been coloring on it for days. But, usually the ones who don't want to do this step come around once they see the final step from their peers.

After the crumbling is done ( and hopefully they don't over do it, too much crumbling and the paper won't hold up to the liquid), and it is time for the black paint.

For this part, I set them up on a tray, with a sponge brush, tissues and a smock.

 They drop only a few drops of the slightly watered down paint, spread it out with the sponge brush and wipe away with the tissue. I have them do this 4 times, once in each corner of the paper. 

If they try to do the whole paper at the same time, the project comes out being very dark. Sometimes this can be fixed by spraying lightly with water and rewiping, but not always.

Wednesday, July 22, 2015

Blot Creatures

This was a project that I did this summer for one of my art camps. We used drops of liquid watercolor and used straws to blow it out. Then, I turned them loose with the sharpies.  
The kids were free to make their blot creatures any way they wanted.  Some did more complex creatures like the above image.  And others kept it more simple like the image below.

I think this group of blot creatures were very original and fun!

I love this one as well.  I get the feeling it is a windy day and this poor creature is about to blow away.  

The above creature was the scariest of the bunch, I know not very scary. It kind of looks like one of my kids when their sister takes away a cookie or something.  You know, those flash looks they give each other a hundred times a day. Most kids tend to make their creatures funny and sweet looking.  

This is such a cool image.  Isn't he precious!  Such a creative kid and already has a signature look to his art.  He didn't need a single idea.  In fact, he marched in and told me he had too many ideas, and wasn't sure which one he wanted to do.  Pretty amazing.  


Saturday, July 18, 2015

Finger Weaving


A fun and easy end of year lesson is finger weaving.  It is great, because it is fairly easy for kids to learn and it needs very little prep.  We let the kids pick out a spool of yarn and learn the technique.  Then, they would unravel and rewrap the yarn.  This cuts down on the cost.  Once they had a day of practicing, then they were allowed to cut the yarn and take home their weaving.  Most kids were able to get it down fairly quickly, and the ones who didn't had lots of peer mentoring.  I love giving the kids opportunities to teach one another.  


This was a practice day and we were about 30 minutes into the class.  So you can see that they can do a lot in a 45-50 minutes class.

The other thing that I loved was listening to them talk of how to use their weavings.  Some kids talked about making scarfs, and some wanted to make necklaces and braclets.  Then, there was a class that decided they would combine all their weavings and see how far it measured.  They started guesstimating how far their collective weavings would reach.  

Monday, July 13, 2015

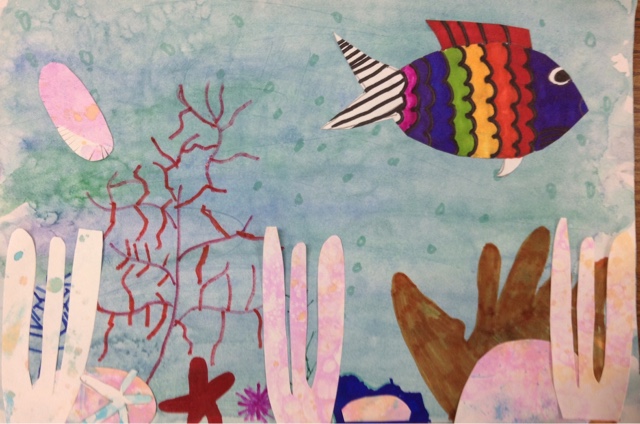
Salting, Bubble Prints And Sharpies; Seascapes

This project was done with my third graders towards the end of school. It combined several techniques.
The background was done with a watercolor wash and salting. We spent one day talking about the seascapes and how to do the watercolor wash. I find that the kids want to over blend the colors, so they need lots of guidance on this. Even with a discussion and demo, they tend to want to blend them completely together.

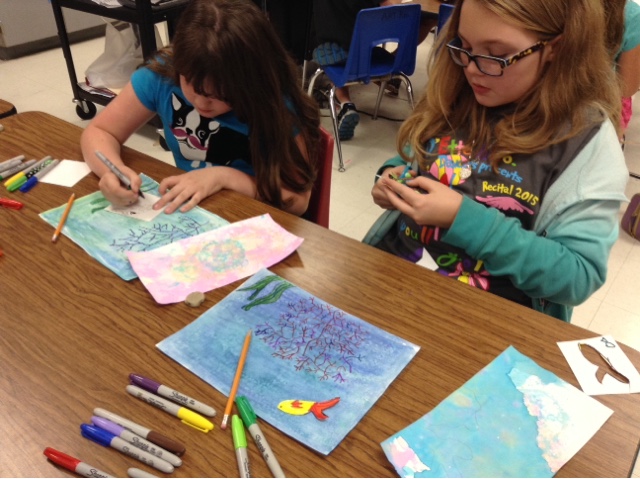
The second day they did watercolor printing with several colors; blue, pink, and orange. Then, they began creating a fish on a separate piece of paper with colored sharpies. They were free to do realistic fish or fantasy. 

Day three, students studied photographs of the reef to get some inspiration. Then they set to work putting together their seascapes.

They were free to use the bubble prints however they wanted, and add details with sharpie.

I really loved the layered, textures I think that part turned out great. And I think the kids did a great job coming up with unique seascapes.

I think tissue paper would also be a great material to add to these seascapes. I will have to add that to my materials list.


Friday, July 3, 2015

The Collograph Stamp

My favorite part of the whole project, turned out to be the stamp itself.
Once the students had their prints done, and they had added the asked materials to each, I had them work on the stamp. First, they used art sticks by Crayola, to color the stamp. Then, they used metallic pigment powders to dust over the color.

Even though this seemed like the never ending project, there was renewed excitement when they started seeing their peers working on these stamps.

For most kids, it only took two days to color with the art sticks and add the powder.  Which is record setting time, when you consider it is the last couple weeks of their elementary career!  

I think I'll be doing these Collograph stamps again, with a few modifications. Number one, the stamp was too big, like 9" by 7". I'm thinking 6" by 4" is plenty big. Maybe this will help cut down on the amount of ink we used.  Also, I'm thinking two prints are plenty. Hopefully that will cut down on the time we spent on the whole project.